Allet för golvet
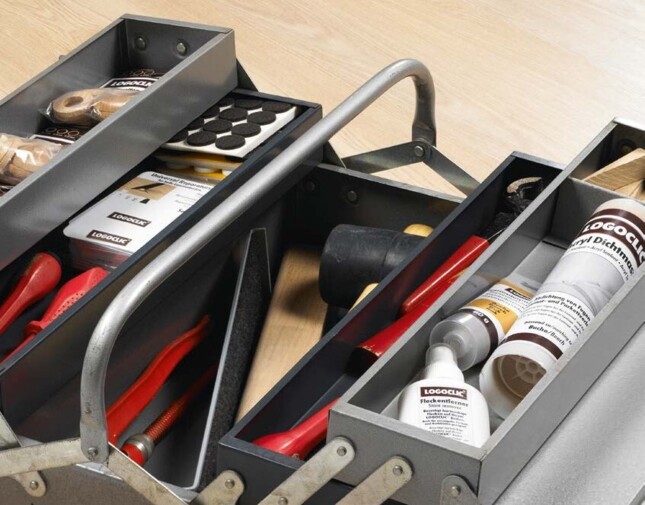
Tillbehör som du behöver till laminatläggningen och skötseln
Vill du ha laminat i ditt hem? Inga problem. På LOGOCLIC® hittar du inte bara eleganta och beständiga golv, här kan du också hitta rätt verktyg och andra material som behövs vid läggningen av laminatet. Med rätt isolering, rätt lister och andra tillbehör som extra laminatrengöring blir laminatgolvet till en verklig trivselfaktor hemma hos dig.

Tillbehör ger bättre utseende och känsla
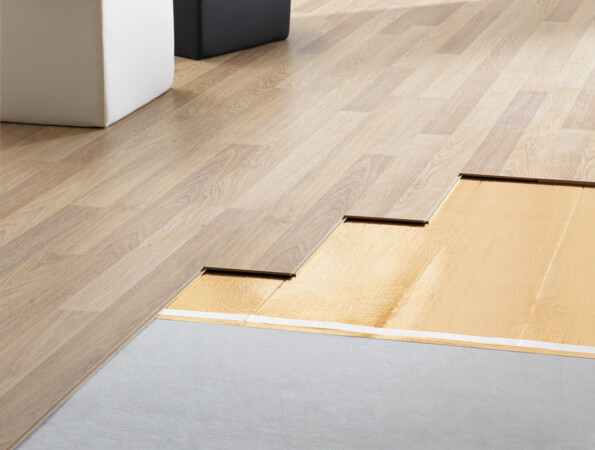
Laminatgolv från LOGOCLIC® är enkla att lägga, tack vare det smidiga clic systemet. Men man får inte glömma lämplig isolering, rätt verktyg eller lister. Du framhäver då inte bara laminatgolvets utseende utan förbättrar också golvets rumsljudkvalitet.
Bästa skötseln av laminatgolv
LOGOCLIC® har också produkter som rekommenderas för laminatskötseln. Med de särskilda rengörings- och skötselmedlen befriar du golvet från smuts på ett skonsamt sätt, motverkar slitage på ytan och förbättrar rumsluften. Den som är noggrann med detaljerna hittar under Tillbehör även rörmanschetter samt profiler av alla de slag.
Titta gärna på det stora tillbehörssortimentet. Både läggningen och den framtida skötseln av ditt LOGOCLIC® laminatgolv går då som en dans.
Why a vapour barrier?
A vapour barrier or vapour retarder is used in the building industry to prevent water vapour from precipitating as condensation in the thermal insulation or flooring. In the laminate flooring sector, the vapour barrier is a film that is usually made of polyethylene (PE film). It prevents moisture from penetrating through the subfloor into the laminate flooring.
We have chosen an insulating underlay that is already equipped with an aluminium foil as a vapour barrier. Is the underlay laid with the silver layer facing upwards or downwards?
The underlay is laid with the coated side facing upwards. Lay the underlay with the aluminium coating slightly overlapping and glue the joints with aluminium adhesive tape. Some of the aluminium underlays already have an integrated adhesive surface.
How do I reduce the walking noise of laminate flooring?
Laminate flooring is made up of individual panels. This can cause noise when you walk on it. The subfloor under the laminate floor also plays a role. To reduce the walking noise on the floor covering, there is no alternative to impact sound insulation. But you have two options here:
- Impact sound insulation as an underlay: Reduce footfall sound by laying an underlay under the laminate flooring. This minimises noise in the room – your neighbours will be grateful too. You will find various types of impact sound insulation in the LOGOCLIC® range.
- Integrated impact sound insulation: The Ambienta product line, for example, impresses with its integrated impact sound insulation. This means that no additional work step is required for impact sound installation when laying laminate. The laminate ideally dampens walking noises thanks to this integrated insulation.
Which is the best insulating underlay to use with underfloor heating?
If laminate flooring is to be laid over underfloor heating, the heat dissipation must be taken into account. If the floor covering insulates too much, the heat of the underfloor heating will be insufficiently used – thus a lot of energy will be lost.
The following reference values should be observed if insulating underlay is to be used with underfloor heating: the total thermal resistance should not exceed 0.15 m2K/W.
When do I need a vapour barrier film?
A vapour barrier is a PE film which protects the laminate from moisture. Because this film prevents moisture rising into the laminate flooring. If moisture were to penetrate the laminate floor, it would lead to swelling and rippling in the floor covering. You will find various types of vapour barrier films in the LOGOCLIC® range.
Take a look at the laminate insulation.
Which floors are particularly silent?
The laminate Silentos has an integrated impact sound insulation. For the laminate flooring Family you need to lay an insulation carpet pad. This is also done quite easily thanks to integrated adhesive strips.
The transition from one room to another in our installation situation is over 15 mm. How can such a height difference be bridged?
Often the floor level of two rooms is different. This difference in height can be a few millimetres, but sometimes more than a centimetre. In this case, you either need special adapter profiles to bridge the gap between the two rooms or you make do with lift-up blocks.
Lift-up blocks are one way of compensating different levels between two rooms. As the name suggests, these installation aids are small blocks that fit into each other, usually made of fibreglass-reinforced plastic.
LOGOCLIC® also has so-called Champion-flex profiles in its range – these allow a height difference between two floor coverings or rooms of up to 23 mm.
According to the laminate manufacturer's instructions, I have to leave an expansion joint in the middle of the room. What is the easiest way to bridge this “gap”?
Laminate flooring moves – this means that the laminate expands over time due to the temperature in the room. So-called expansion joints must therefore be taken into account when laying laminate flooring. To bridge these joints in a visually appealing way, there are skirtings that cover the distance to the wall and profiles that cover the transition to another room or to another floor covering.
There are various types of profiles in the LOGOCLIC® range. Transition profiles are best suited for expansion joints. These are available in different widths and heights, different colours with different installation options. LOGOCLIC® transition profiles can either be screwed or glued.
What are profiles needed for?
Different floor coverings are often laid in a flat or house. And even if the same floor coverings are used throughout the house, they are not always laid continuously in all rooms. In both cases, joints occur. These want to be hidden and covered. On the one hand, for an attractive appearance, on the other hand, to avoid tripping hazards. This is exactly what profiles are needed for. These create smooth transitions between different floor coverings and ensure perfect edge trims.
What types of profiles for floors are available?
Es gibt folgende Arten von Profilen:
- Transition profiles: from floor to floor – requires same height
- Adapter profiles: from floor to floor – compensation of differences in height possible
- End profiles: laminate to adjacent components (wall, balcony etc.)
- Angle profile: finishes off stairs and steps
We have underfloor heating throughout the house and cannot drill into the screed. How do we fix the transition profiles?
Two options are available for this:
- Using assembly adhesive: LOGOCLIC® profiles can not only be attached using screws, most profiles are also suitable for the adhesive method. If this is the case, there are special adhesive grooves on the underside of the profiles. These serve to enlarge the adhesive surface. Attach the transition profiles quickly and easily using assembly adhesive (note setting time).
- Self-adhesive profiles: Some of the profiles are also self-adhesive and do not require any external adhesive application. Remove the adhesive film just before attaching the profile, then firmly attach the profile to the expansion joint. Prerequisite for this: the floors to be joined should have the same height.
I would like to make the tiled area under my stove rounded and need a corresponding transition profile to the adjacent laminate.
Special products are needed to be able to round profiles. It doesn't matter whether you want to bridge a rounding at the tiled area in front of the stove, a column in the room or the round end of a carpet: in each of these cases, a bending profile or a bendable skirting board is necessary. Bending profiles are often made of aluminium or brass and can be bent by hand. In addition to the aluminium or brass version, there are also strips and profiles made of thermoplastic material.
Why an expansion joint for laminate?
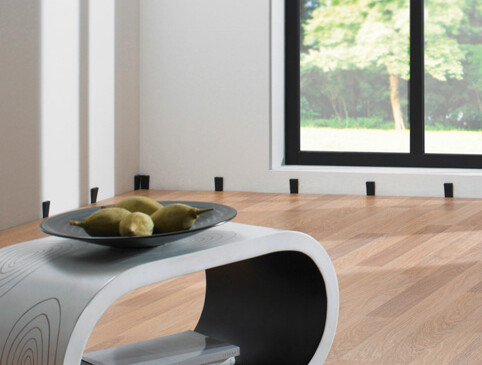
Expansion joints are often also known as movement joints or dilatation joints. They are used to compensate for any swelling or shrinking behaviour of laminate flooring in larger floor areas. Coverings such as parquet or laminate can expand (swell) or contract (shrink) with temperature fluctuations or changes in humidity. These possible changes are compensated for by an expansion joint at door jambs, room transitions or to the wall. The expansion joint is approximately the thickness of the material – ideally around 12 millimetres.
For particularly large laminate areas – for example, from a length or width of eight metres – an additional expansion joint should be planned in the middle of the room to prevent the formation of ripples here.
Would you like to learn more? Then take a look at laying laminate.
We want to cover an unsightly staircase with laminate. Are there special end profiles for this?
Yes. Even stairs can be covered with laminate with a little skill. Since the panels have to be cut to the right width for this, an edge remains through all the layers of the laminate flooring, which is unsightly on the one hand and sensitive on the other. If you want to decorate or conceal this edge and protect it from external influences, LOGOCLIC® is the right choice for you!
The range of profiles includes special end profiles for stairs, so-called angle profiles. In the accessories section you will find an overview of the laminate edging profiles on offer. You can buy these exclusively in the BAUHAUS specialist centres. Please feel free to contact a sales consultant, who will be happy to answer your questions.
The skirting boards on offer are all too high for me. I would like a small, refined skirting.
Yes. LOGOCLIC® offers numerous different strips for an attractive finish for your laminate flooring. If you would prefer a small, refined skirting, you would be well advised to use a quarter round, available in different versions.
Does the decor of the skirting boards always match the floor 100%?
The production processes for laminate flooring and skirting board differ. Laminate flooring from LOGOCLIC® is built up in six layers, comprising footfall and impact sound insulation, a stabilising layer, HDF core material, antistatic paper, decorative layer and an overlay. The decor layer is the paper printed with the desired decor, which is pressed onto the top of the coreboard with melamine resin and together with the overlay under heat.
Skirting boards, on the other hand, are not produced this way. That is why it is not possible to produce skirtings that are one hundred percent “decor-matched” to the floor. However, LOGOCLIC® skirtings are very similar to the decor of the chosen floor.
Why an expansion joint for laminate?
Expansion joints are often also known as movement joints or dilatation joints. They are used to compensate for any swelling or shrinking behaviour of laminate flooring in larger floor areas. Coverings such as parquet or laminate can expand (swell) or contract (shrink) with temperature fluctuations or changes in humidity. These possible changes are compensated for by an expansion joint at door jambs, room transitions or to the wall. The expansion joint is approximately the thickness of the material – ideally around 12 millimetres.
For particularly large laminate areas – for example, from a length or width of eight metres – an additional expansion joint should be planned in the middle of the room to prevent the formation of ripples here.
How can I connect the skirtings at the butt joint?
Quite often, a wall is longer than the standard dimension of a skirting board. In this case, several skirting board sections have to be combined. This results in a butt joint where the two ends of the skirting boards meet. – But how do I avoid the gap between the two skirtings being visible? You have different possibilities:
Connecting skirtings by butt joint: The point where two skirtings meet is known as the “butt joint”. The skirtings can be cut using a so-called mitre cut, at an angle to each other, or be prepared with two straight ends. When connecting the skirtings in this way, it is advisable to attach an installation clip centrally behind the joint in order to be able to mount both skirtings with only one clip.
End caps in the visible area: An alternative to the variant mentioned above is the installation method using end caps. In this case, two end caps are simply glued together to form a “transition cap” – this way you avoid a possible gap at the joint.
How do I fix skirting boards in place?
Whether mounting with clips, with integrated support strip, by nailing or gluing: our instructions will help you with the installation of LOGOCLIC® strips. Nevertheless, the motto applies: good preparation is half the work.
Here you can find the installations of skirtings.

